Trinity D3 Light Oak

Trinity D3 Light Oak

Trinity D3 Light Oak

Certified Refurbished
£99.95
In stock
BUY INSTANTLY USING ONE OF
OUR QUICK CHECKOUT OPTIONS.
Trinity D3 Light Oak
Trinity D3 Light Oak Trinity D3 Light Oak Trinity D3 Light Oak Trinity D3 Light Oak Trinity D3 Light Oak
 
Specs

Dimensions

  • Speaker Dimensions | 200 x 370 x 158mm
  • Weight | 4.1Kg
  • Power | 30W Max Output

Features

  • DAB & DAB+ approves digital radio
  • HD Sound with subwoofer ports
  • Full colour LCD Screen
  • Remote Control
  • 30W Max Power Output
  • EQ Controls with Treble and Bass
  • Auto Time & Date Setup
  • CD Player
  • Multi-Alarms
  • Sleep Timer
  • Milti-level display brightness
  • Snooze Control
  • Aux in Audio
  • Line Out Audio
  • Headphone Out
  • MP3 & USB media playback support
  • BT Wireless Audio

Connectivity

  • DAB & DAB+ Radio
  • FM Radio
  • Auxiliary Cable (3.5mm Jack) for audio IN
  • Auxiliary Cable (3.5mm Jack) for audio OUT
  • Auxiliary Cable (3.5mm Jack) for Headphone OuUT
  • USB x 2
  • BT Wireless Audio


What's in the box

User Manual

Warranty Card

Power Cable

Remote Control

3.5mm to 3.5mm Aux Cable

Trinity D3 CD Player

Write Your Own Review
You're reviewing:Trinity D3 Light Oak
Your Rating
Support
Over time new stations may become available. To find new stations you can auto scan as follows.
  1. Pressing SCAN at any time will automatically scan and store stations.
  2. Press MENU and FORWARD/TUN+ or BACKWARD/TUN- to choose Full scan to search new stations.
To pair your device via BT Wireless Audio for the first time:
  1. Press the POWER/MODE button to select BT Wireless Audio mode
  2. After a few seconds the screen will then say “BT SEARCHING” and will automatically enter pairing mode.
  3. On your BT Wireless Audio Device do a search and once available please select “Azatom Trinity”.
  4. After 5-20 seconds the screen will say “BT connected”.
  5. You are ready to start streaming via BT Wireless Audio. Play any sound on your BT Wireless Audio device and listen via the speaker.


  6. Whenever the BT Wireless Audio Mode is selected, the radio will automatically go into pairing mode.
  1. Press MENU to enter the menu.
  2. Press MENU and FORWARD/TUN+ or BACKWARD/TUN- to choose “System settings”.
  3. Press FORWARD/TUN+ or BACKWARD/TUN- to find “Factory Reset”. Press ENTER to confirm.
  4. If you wish to perform the reset operation, push the FORWARD/TUN+ or BACKWARD/TUN- buttons until “YES” is highlighted on the display and press ENTER to confirm.

  5. A full reset of your radio will be performed, All presets and station listswill be erased.

  6. After a system reset an automatic scan of the DAB band will be performed.

NOTE: This unit not only plays commercial compact discs but also self-complied CD-RW discs. Because of non-standardized format definition/production of CD-R/RW, playback quality & performance is not guaranteed. The Manufacturer is not responsible for the playability of CD-R/RW due to recording conditions such as PC performance, writing software, media properties etc. Do not attach a label or seal to either side of the CD-R/RW disc. It may cause a malfunction.


PLAY MODE:

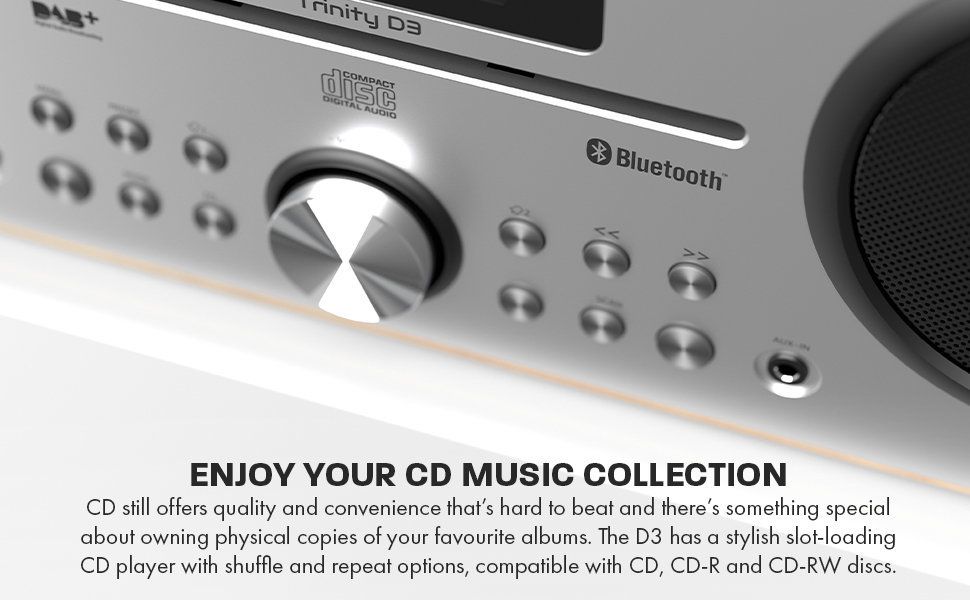
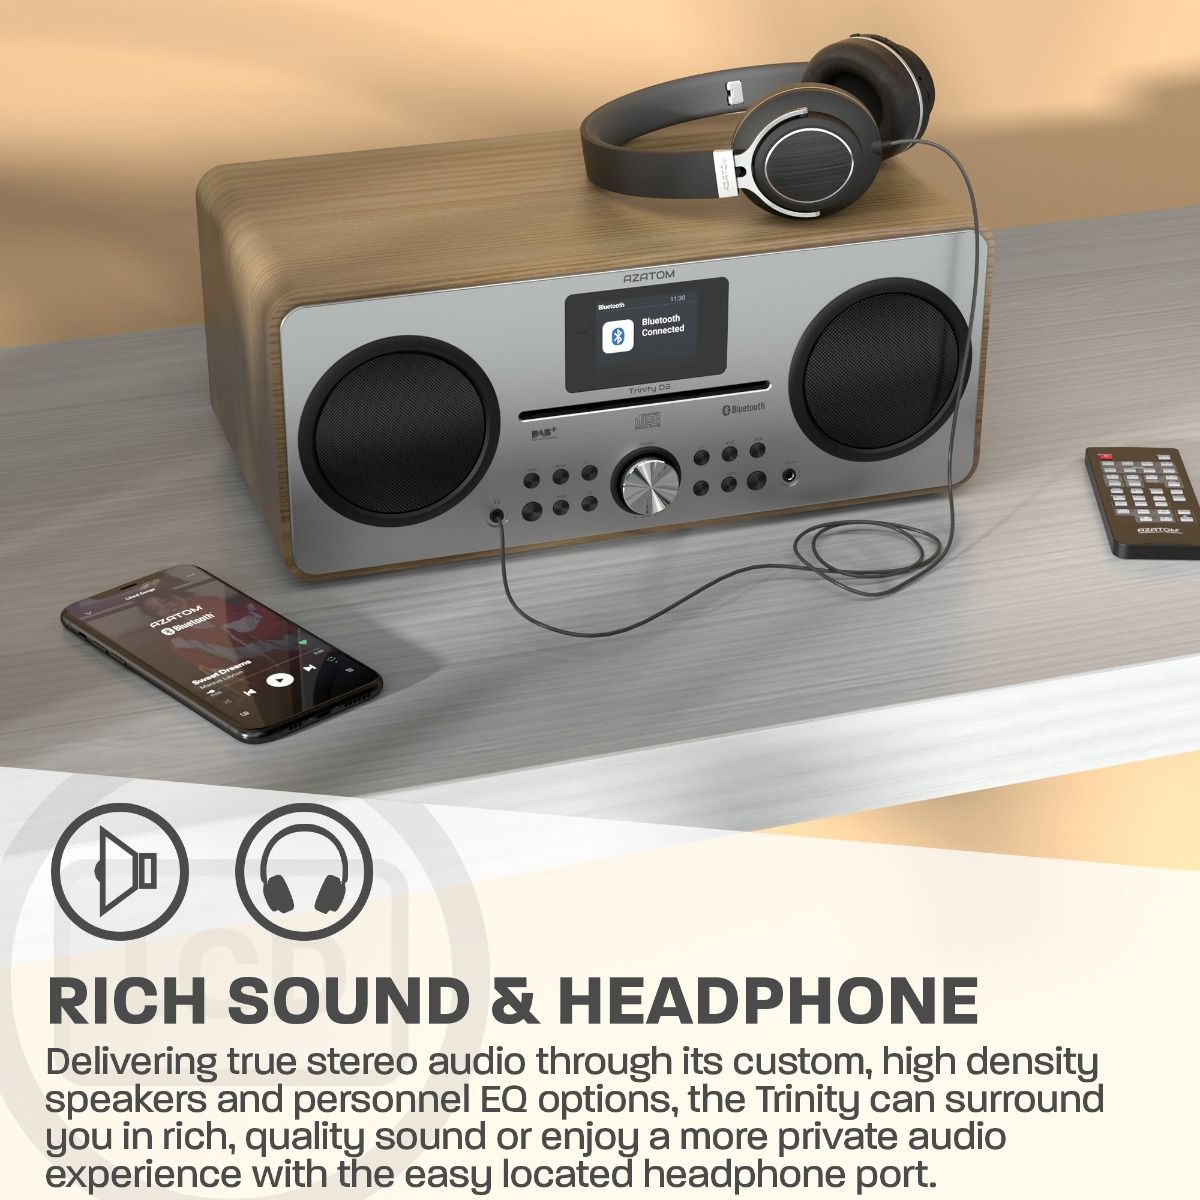
  1. Press MODE button to enter CD mode.
  2. Insert a CD with the label side facing upward.
  3. Disc information (total number of tracks) will appear on the LCD DISPLAY.
  4. Press PLAY/PAUSE BUTTON to start playing the CD.
  5. While playing music, press the PLAY/PAUSE BUTTON to pause playback, press PLAY/PAUSE BUTTON again to resume playing.
  6. Scroll VOLUME- or VOLUME+ adjust to the desired volume level.
  7. Press STOP BUTTON to stop playing music.
  8. To turn off the CD player, press POWER BUTTON.

NOTE: If skipping occurs during CD playback, try turning the volume down. Check the CD to ensure it is not scratched or damaged.


REPEAT MODE:

Repeat 1: Press PRESET BUTTON is pressed once, you will see REP_ONE on LCD display. The current track will be repeated.


Repeat All Tracks:

Press PRESET BUTTON is pressed twice, you will see REP_ALL on the LCD display. The whole disc will be played continuously. Press PRESET BUTTON is pressed three times, you will see RANDOM on the LCD display. The whole disc will be played randomly.

To Cancel Repeat Function: Press PRESET BUTTON again to cancel the repeat function.


SKIP AND SEARCH MODE:

  1. During Play or Pause mode, tap the SKIP FORWARD or SKIP BACKWARD Button to go to the next track or go back to the beginning of the current track.
  2. During playback, press and hold the SKIP FORWARD or SKIP BACKWARD Buttons to search within the current track with audible high speed playback.


PROGRAM PLAY MODE:

This function allows music tracks to be played in a programmed sequence.

NOTE: Program can only be set in STOP mode.

  1. Press the PRESET BUTTON once, you would see “P01” blink on the LCD DISPLAY.
  2. Press the SKIP FORWARD or SKIP BACKWARD BUTTON to select the track to be programmed.
  3. Press the PRESET BUTTON again to store the selection. The LCD DISPLAY will advance to “02” and flash to prompt for the next track.
  4. You may repeat steps 2 to 3 to program up to 20 tracks. As soon as you have entered the 20th track, the LCD DISPLAY will automatically show the programmed tracks one by one in their correct sequence starting from the first programmed track. If you wish to program less than 20 tracks, press the PRESET button twice after confirming your last track. At the end of the sequence, “01” will blink on the LCD display, ready to play your first programmed track.
  5. Press PLAY BUTTON to start the programmed playback. Press the STOP BUTTON to stop playback.
  6. Programmed tracks will be played through once and then stop. However, you may use the REPEAT function to repeatedly play a certain track (Repeat 1) or all tracks in the program (Repeat All). You may also press SKIP FORWARD BUTTON to go directly to other tracks ahead or use SKIP BACKWARD BUTTON to go back to previous track(s) during program playback.
  7. To cancel program play, press the STOP BUTTON twice during program playback FOLDER+/10 track + (MP3 CD DISC only):
    1. Press SCAN once to skip 10 tracks
    2. Press SCAN and hold 3 second to skip FOLDER

User Manual Icon Download User Manual - Need more help? Simply download the user manual for more detailed information.

Frequently Asked Questions
Yes, just pop in a USB drive into the USB port on the side of the unit and select the "USB" source on the mode menu.
The Trinity D3 used 3" full range drivers with a max power output of 30Watts. The full bodies sound is very powerful and rich thanks to the high spec drivers and bass port technology.
Yes, the Trinity D3 comes with a remote that can control presets, the CD player fuctions, MP£ playback functions, BT Wireless Audio functions and so much more.
Yes, Using the LINE OUT port on the side of the unit means you can connect to external speakers and intergrate the Trinity into any exciting home entertainment system. Plugging on external speakers via the LINE OUT port also means the Trinity D3 will still output sound via its powerful full range drivers as well.